Version: Desktop |


Wilderness Survival Shelter
How to build an effective bushcraft shelter in any environment
Shelter is one of the four essential survival priorities.
Shelter becomes especially important in extreme environments, such as the harsh cold where shelter is needed to hold in warmth and block wind, or the harsh heat where it is needed to provide shade.
Shelter is also important in the jungle, where you need to get dry and sleep off the ground where snakes and insects roam. In certain locations, it will be essential in the protection from dangerous predators.
The type of shelter that best suits your needs will vary on the environment. Is your shelter for windblock or shade? Rain proof or heat containment? Animal protection or hunting advantage? These factors and more will determine what kind of shelter you need, then you must use whatever materials are around you to make that happen. In a longterm living situation, your shelter should be in a secure location with convenient access to your major needs, mainly water, food, and fire wood.
Sleep is essential to bushcraft living. Sleep deprivation causes a loss of mental faculties and clarity, and leads to poor decision making, which is especially dangerous in the wild. You need an effective shelter that protects you from the elements and is comfortable enough to get some good sleep. And besides, bushcrafting is all about enjoying your time in the wild!
Ingenuity is always the best skill when it comes to bushcrafting and shelter building, but there are several tried and true shelter techniques that work very well and are worth knowing.
Basics
You want your camp to be close to a water source, but if too close, you may be pestered by many insects. The noise of running water can hide other sounds like those of a dangerous animal.
Don't make you shelter on a hilltop, where it is prone to wind and lightning. Cold air sinks, so stay away from valley bottoms and the like if coldness is a concern. Ensure your camp site has no risk of flooding and is safe from widowmakers(big dead trees), falling rocks, and avalanches.
Some places are prone to flash flooding, especially mountainous regions, in which a virtual wall of water can drown a completely dry area in just minutes, with no prior warning. So stay off low areas and away from dry stream beds.
Give yourself plenty of time to establish a good shelter for the night, at least a couple hours before nightfall. The last thing you want to happen is get caught out at night without a shelter, especially in the cold. Nor do you want to rush about at the last minute trying to throw something together. Often times, panicking and rushing causes one to make mistakes and get injured.
Wind chill increases body heat loss significantly, so take this into account and be certain your shelter blocks the wind in cold environments. Also, in cold places you do not want to sleep directly on the ground, or you will lose significant body heat through conduction, the ground will literally absorb your heat. Ensure you lay on some type of insulation, like pine needles, foliage, fluffy bark, plant matter, unused clothes, etc. or are on a raised platform.
Ensure that your shelter has ventilation, air needs to cycle through. Without ventilation you will be breathing the same air over and over, which can cause carbon dioxide poisoning, musky humid air, and/or trapped smoke. Preferably make two holes, one near the bottom of the shelter and one near the top. In snow shelters the ventilation holes should be checked regularly to ensure they have not become clogged with snow.
There is a great, easy to remember method for checking the basics of a good shelter location called the "5 W's".
Trees
Big fallen down trees can make great shelters, especially evergreens. Break, cut, or move the branches that are directly under the fallen tree and put them on the side, so there is a space for you to reside in.
Ensure that the fallen tree is secured and will not fall on top of you. If the base of the fallen tree is still sitting on a stump, this provides a good space to camp under, so long as it doesn't fall off the stump or collapse! If it is a small tree, the danger of it crushing you is far less, if at all. This is similar to an A-frame shelter.
Some trees provide a dense, low canopy of leaves and branches that can be sufficient enough for a good shelter in mild environments. Occasionally you may find a big tree that is hollow inside, which makes great shelter.
Caves
Caves can make great shelters!
Approach any cave you find with caution, animals like to reside in them. Make loud noises as you approach, so as not to suddenly startle a predator when you enter. Throw sticks and stones into the cave from a distance and listen for animal noises. Smaller animals like snakes and rats will also likely be found living in a cave. A good fire will usually drive them out, so leave open an escape route.
Sometimes caves will even have a fresh water source, especially when running deep into a hillside. There may be a stream in the cave or water may seep through the rocks from above.
Always check for rockfall before sheltering up in a cave. Some caves drop chunks of rock regularly, others never do. You will notice signs of recently broken rocks on the floor and sharp cracks in the ceiling in a dangerous cave, do not take shelter there. When burning fire in a cave, heat it up slowly, quickly changing temperatures can cause the rock to crack and fall.
When sheltering in a cave, it is useful to put the fire in the cave instead of near the entrance. This provides more warmth and the smoke will travel to the ceiling and out the entrance. If you have a fire at the entrance of the cave, a lot of heat will be lost and smoke may blow in where you are breathing. In a shallow cave, put the fire at the back.
Snow Shelter
Snow can be a great material for winter shelter. It provides excellent insulation and windbreak.
You can take heavy snow and build it up into walls, try to compact it. You can stack on top a lot of conifer (evergreen) branches for a roof, and add on top of that a thin layer of snow for extra insulation. Check the roof regularly and remove excessive snowfall, otherwise the roof could collapse with heavy snow on it.
Where there is heavy snow, there may be a large pocket of air under a big conifer tree near the trunk where the snowfall did not reach. If you can find one it is a good start to a winter shelter, with windbreaks on all sides and an insulated roof overhead.
Check on the leeward side of evergreen trees as that side will be more protected from wind and less susceptible to snowfall. You may need to add more branches and pine boughs for better coverage.
Snowfall creates space under evergreen tree

If you can find a large drift or mound of snow, you can dig deep into it, a few feet below the surface, and create a type of snow cave which is great for insulation and protection from the wind.
Sculpt the top of the cave in a parabola (curved) shape, this gives extra strength to prevent the snow from collapsing. Dig a lower level next to where you will be resting for the cold to sink down into. Make a couple holes for air ventilation.
It's best to dig with some type of implement, or at least a thick stick, but you may be able to dig with your hands as long as they are well covered by gloves.
Snow cave

If you have a proper implement and the snow is right, you can cut it into blocks and stack them, this is how igloos are made. Any long narrow item may work for cutting the snow, something like a machete or saw is ideal.
The ideal snow for making blocks will support a man's weight without making much impression, but be soft enough to penetrate with a probe. Make the blocks about 6 inches thick, this will provide good insulation yet allow some sun to penetrate and warm the shelter.
Igloos can be tricky to construct without experience, but an easier method involves stacking snow blocks on top of each other, but only about 2/3 overlapping the block below it. This way the structure starts to close in at the top without the trouble of having to angle the blocks inward for that classic smooth dome look.
Easy igloo construction

When stacking snow blocks center each one over the middle of the joint below, like laying bricks. Fill any cracks with snow. It is usually easiest to build the whole structure first and then dig out an entrance. Don't make the entrance facing into the wind. Make several ventilation holes, but not facing the wind. Smooth out the inside to prevent drip points. The smaller the winter shelter, the warmer it will be inside due to trapped body heat.
If you can get a small fire inside that is great, but too hot and it will melt the structure! A traditional Eskimo method is using a "kudlik", a small oil lamp consisting of animal fat in a dish with a wick, usually made of grass seed cotton or fabric. It is similar to a candle when burning, but can be many times hotter.
Sod Shelter
One of my favorite bushcraft shelters is a "sod house". This is labor and time intensive and only practical in a long-term situation. You need good grass for this.
Cut and pull up turf rectangles from the ground, 1-3 inches deep and 6-18 inches wide, and simply stack them to build walls. Lay them like bricks, in an alternating fashion.
Build one wall taller than the opposite wall and the connecting wall(s) at an angle so a pitched roof can be attached, which will deflect rain. Build the roof with wooden poles and cover it with leaves or sod, preferably in a shingled fashion.
Pull up the sod by cutting it with a large metal implement such as a machete. It will definitely dull the blade, but it can be resharpened later. It is also possible to build a small sod structure in an igloo shape, not requiring any additional roofing material. Too large and it is likely to collapse.
A-Frame Shelter
One of the most common bushcraft shelters is an A-frame.
An A-frame shelter is usually built by laying one long wooden pole "backbone" on two support branches, with the other end resting on the ground. Then you simply add an assortment of tree branches and foliage to the sides by laying them on the backbone. This is easy to build and quite effective.
A-frame shelter

A similar shelter to the A-frame is one where you take one long wooden pole for the backbone, and put two-stick supports throughout the entire backbone. So instead of laying the backbone on one support, the supports are in several places from one end to the other. Then just cover the sides with branches and leaves, and you can make the structure stronger by weaving branches throughout the supports.
"Rib" shelter frame

If you have a large tarp, hide, or sheet, it can be placed over the structure instead of using branches and leaves for the sides, then the tarp can be pinned down to the ground with stakes or have heavy rocks or dirt placed on the excess to hold it in place.
If you can stick the supports into the ground and bend them to the backbone, then tie them in place, you will create a parabola shape instead of a triangle, which will give more living space.
Instead of using makeshift support legs, you can rest the backbone in y-junctions on trees.
Lean-To Shelter
Another common bushcraft shelter is a simple "lean to". There are two basic versions.
One version consists of an already made wall such as a rock face, and you simply lean long poles, branches and other materials against it at about a 45 degree angle to create a roof.
The second version consists of the poles and branches being supported by other poles or trees, so the side is completely open instead of a wall being there.
As usual, build the roof/wall facing windward so it blocks the wind.
Lean-to shelter

Tipi
Tipis are a favorite of mine. They are especially easy to build if you have a large tarp.
Just gather 5-10 wooden poles and tie them together at the top, then spread them out at the base. The more poles the structure has the stronger it will be, especially against wind. Wrap a tarp or sheet around this frame.
It's also possible to use an assortment of branches, leaves, mud, moss, bark, grass, etc. on the outside instead of a tarp, this is what's called a wickiup or wigwam shelter. You should first weave bendable branches throughout the stacked poles to create a framework to lay the debris on. Birch bark makes good panels when cut in large pieces, but taking excessive bark or ringing a tree can kill it, so avoid it if possible.
A great thing about a tipi is you can have a fire inside, as long as it is wide enough and there is a hole at the top for smoke to escape, then the hole can be covered, for example with a hide, when it rains. This is the type of shelter many Native Americans used.
Common Tipi

Jungle Shelters
In a jungle you need to be raised off the ground when you sleep. The ground is wet, and many insects, leeches, and snakes crawl upon it, especially at night.
You will also need to dry out regularly. Staying wet continuously can cause skin ailments such as trench foot, plus it's uncomfortable. A fire will effectively help you get dry, but in a jungle where it rains almost constantly, you will also want a rain proof shelter which will keep you dry. In a jungle, there are usually plants with very large, broad leaves which make great roofing material, such as palm leaves, banana leaves, and elephant grass.
You will want to sleep on a raised platform, off of the ground where snakes and insects roam, and water collects. There are a number of ways to build a raised platform, they generally consist of making four pegs in a rectangle, then securing wooden poles on the pegs and then laying a bunch of wooden poles across these supports. Lash cordage to the frame to secure it properly, if available.
A raised platform bed can be made more comfortable by stacking soft material like plant matter on it, or even dirt. It's also possible to build a raised platform by resting the supports in low junctions on trees, where available.
Making Panels
When making a roof or wall for many of these types of shelters, such as the A-frame or lean to, it will be especially effective and durable if you make a rigid panel frame instead of just stacking branches. This takes more time, but may be worth it.
Take four sticks about the same length, and tie them together at the ends to form a square, or rectangle. Then tie more sticks across the width of the panel. You can then weave branches, vines, and leaves throughout this "grated" frame. When used as roofing, add shingles.
Bushcraft shelter panel

Roofing
When applying roofing material such as leaves, put them on the lowest part first, then work your way upward stacking them on top of each other. This will create a shingle effect which will shed rain more effectively than just stacking them randomly. This shingle technique is especially effective with large pieces like bamboo halves, palm leaves, and birch bark panels.
In general, the steeper your shelter walls and roof, the more rain proof it will be. So avoid shallow angles where rain is a concern.
It is a good idea to dig a channel below where the water runs off of your roof. Otherwise, it may hit the ground and flow inside your shelter.
Bamboo
Bamboo is probably the most useful and versatile single plant in the world. Not only can it serve for any part of your shelter, but it also contains clean drinking water in its hollow segments, can be used as boat pontoons with the air in its hollow segments, makes a great drinking straw and blow gun, flexible fishing pole, canteen, hammock, and more.
Split large bamboo stalks in half lengthwise, then lay out a row of them, and another on top facing the opposite direction, covering the joints for an excellent rain proof roof. A final piece can be used at the bottom as a gutter. Bamboo halves can also be flattened to make walls and flooring.
Waterproof bamboo roof method

Be careful when harvesting bamboo, they often grow in tangled clumps, and are bent under pressure. When cut they can go flying and even break into shrapnel.
Additional Shelter Tips
A shelter is much more comfortable if you can sit in it, rather than just lie.
In wilderness survival, you are usually either dealing with weather or preparing for weather.
In a cold survival scenario, staying dry is essential. Water sucks the heat right out of your body. Wet and cold is more dangerous than dry and colder. In fact, when submerged in water your body loses heat 25 times faster than in air. Experiments have shown that when submerged in only mildly cold water for one hour, such as 60 degrees Fahrenheit, can be very dangerous.
In a cold environment, construct something that will reflect the heat and infrared rays of a fire back toward you and your shelter. This is called a "reflector". Even if it is a wall that is not part of your shelter at all, but is on the opposite side of the fire, it will provide much more heat this way, instead of that heat just getting lost to the open. It's good to have your shelter, with the one entrance facing a fire a foot or two away, and then a wall on the other side of the fire.
You can build walls by sticking two sticks in the ground, a few inches away from each other, and then pile sticks, debris, and/or earth in between them. Add two more support sticks a foot or two away from the first two, and continue this for several feet for a long wall. Tie the two sticks together at the top for added strength.
Bushcraft wall construction

If you have a good sized tarp or sheet, and some cordage, you can easily rig any variation of roofs and walls by tying the tarp to various trees. Angle the tarp so it blocks the wind.
If you are laying on the ground and on a slope, you can protect yourself from rainfall by digging a trench around your shelter on the higher side for runoff to enter and flow around you shelter.
Parabolas, like arches, give good shelter strength. Often impractical to build, but good to know.
Continue to Survival Kit...
Leave A Comment
Add Comment
Wilderness
Survival Gear
Fixed Blade Bushcraft Knife

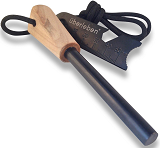
Ferrocerium
Rod Firesteel
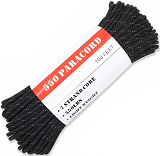
550 Paracord
Stainless Steel Canteen

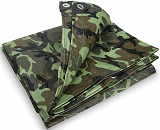
Waterproof
Tarp
Multitool

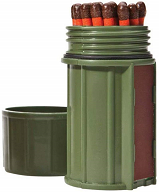
Stormproof Matches
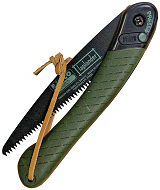
Folding
Hand Saw
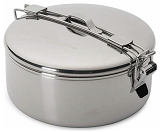
Stainless Steel
Pot
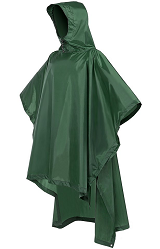
Waterproof
Rain Poncho
Water
Purification
Tablets

Kukri Machete

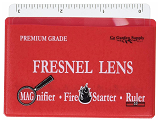
Magnifying
Lens Firestarter
Duct Tape
Compass
Water Filter
Magnesium
Stick Firestarter

Blade
Sharpener

Firestarting
Tinder
Fishing Kit

Survival Gear
Fixed Blade Bushcraft Knife
Ferrocerium
Rod Firesteel
550 Paracord
Stainless Steel Canteen
Waterproof
Tarp
Multitool
Stormproof Matches
Folding
Hand Saw
Stainless Steel
Pot
Waterproof
Rain Poncho
Water
Purification
Tablets
Kukri Machete
Magnifying
Lens Firestarter
Duct Tape
Compass
Water Filter
Magnesium
Stick Firestarter
Blade
Sharpener
Firestarting
Tinder
Fishing Kit
Comments (5)
Cool beans! I loved the foto prints for the diagrams you provided. I watch you and Cody almost every day on TV, love you guys. I'd really like to have a book of yours to put in my collection, can you send me a personal message of where I can buy one? I watch Les Stroud too, and I have all his books. Keep me in touch with any new items or print you have ok? Thanks!!!
Sorry to disappoint.. but I am not Dave Canterbury (nor Joe Teti) and this website has no affiliation with them other than their being briefly mentioned. Cody and Dave both have personal websites you can visit by doing a google search.
You can get almost any book on Amazon. And if you want to go on a survival trip with them I believe they both provide wilderness classes, visit their websites.
yes
this is very useful , i will use these shelters and the heat reflector walls on my future adventures
and thank you for the info take care and God bless
I love learning different techniques for building shelters. I always try to teach my kids that if we can walk out our front door of our home and still feel at home and can survive then we're ok. Thanks for having pictures with instructions, this makes it a lot easier when teaching children!
Very well written blog! Found lots of very good information well done.